

Waking up to a successful print is a great feeling. Waking up to a successful print on the second day of CMWS19 is an awesome feeling.
Happy with my pumpbracket.


Fits perfectly. Snaps in place with just a little push and will not only keep the two pumps in place, but will help keep the case more rigid as I have removed every bar and steel component from it.

After a lot of planning, measurements, a few dummy pieces in cardboard I took out the 5mm thick acrylic that will serve as the new inside mounting wall and motherboard tray. Trimming detailed cuts on my Ryobi saw is just amazing. Love that saw.
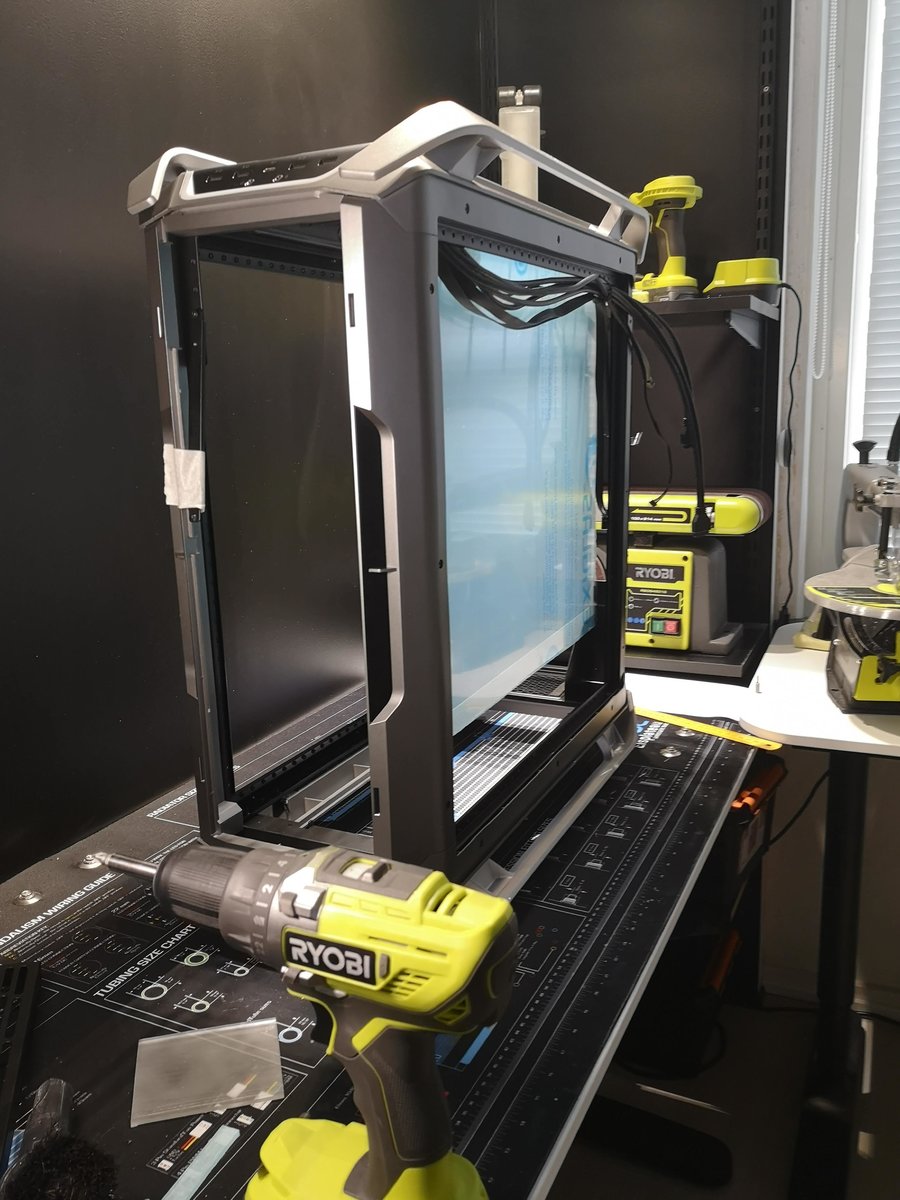
This is how it will fit from the backside. I’m moving the backside “wall” 40mm further into the case to make room for some backside goodies. Unhidden | Tribute
Decided, as I usually try to do when I mod, to keep the case as it is. No drilling or cutting into the original case. That is my main idea. Therefor I decided to hang the wall onto the radiator frames.
After some thought I came up with this design in Fusion 360. A snap in bracket to fit exactly into the cable cutouts of the radiator frames.

After less than 1 hour on the print bed I got a perfect fit from start.It snaps into place from the inside of the radiator bracket.
From the outside it shows how snug fit it is.

Test drilled two 5mm holes 12mm apart in a scrap piece of acrylic. It worked like a charm.

Had to test with it onto the bracket and with a 5mm thick acrylic. It is just a little loose, just like I need it, as I plan to add a little more surface thickness when I do the wall finish.

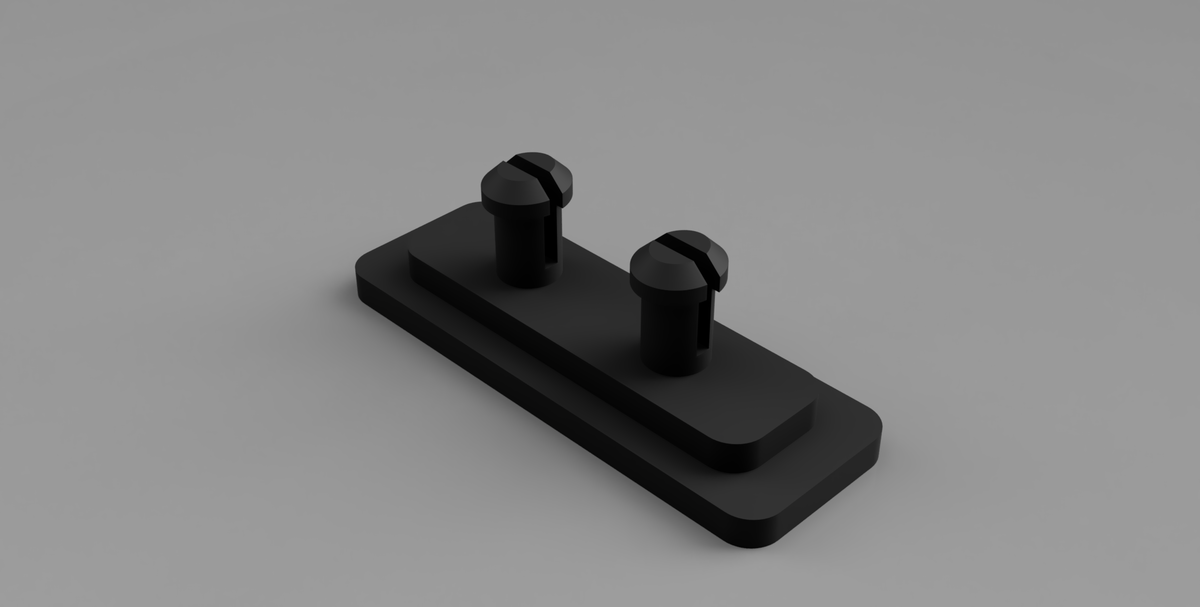
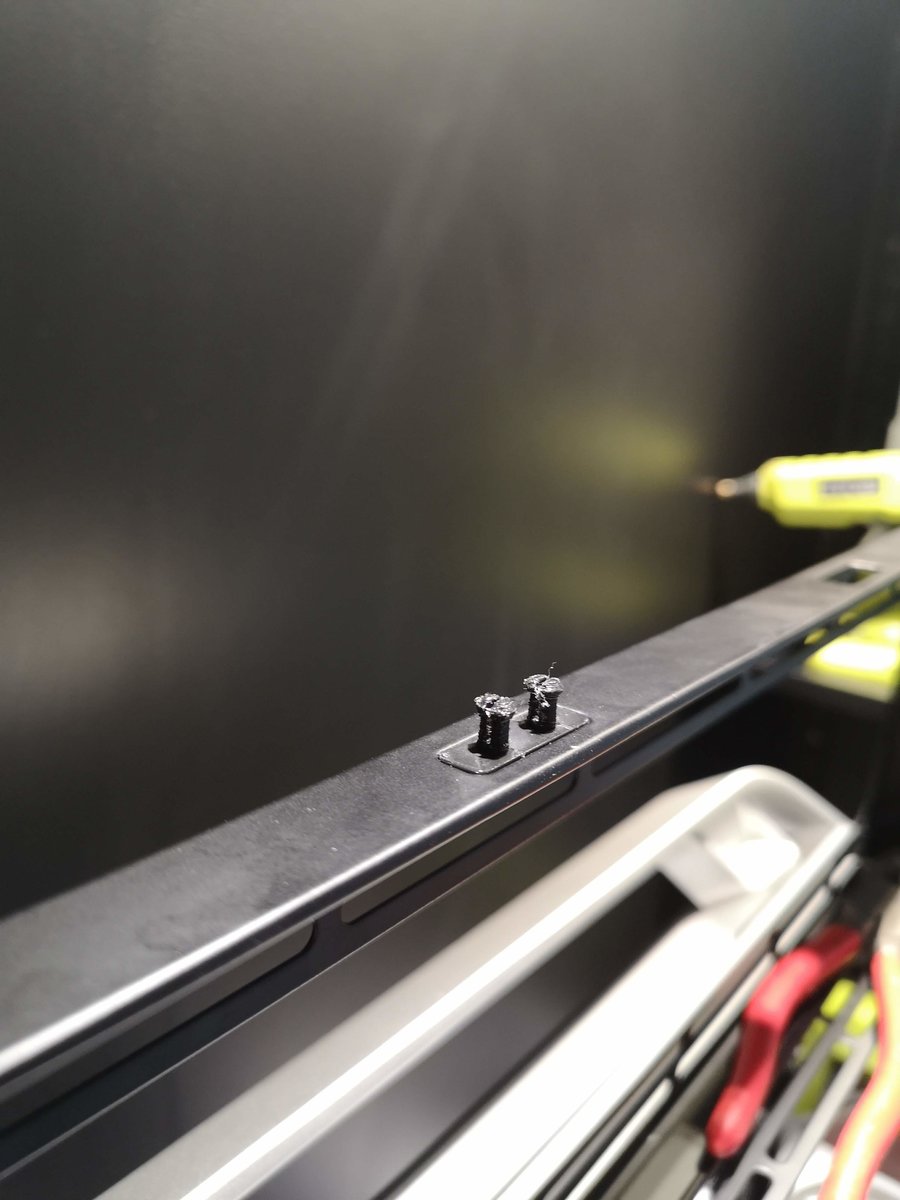
After that I still wanted to ensure the inside wall would stay in place with more then just a few plastic pins. Decided to create a little more complex piece and make use of the dual corner frame of the case.

Came out really nice on the first print.

Twist and snap onto the two bolt rivets of the case and then a screw from the original box and it fits perfectly. It both squeezes the wall onto the PSU bracket as well as giving the acrylic an edge to stand on. Super happy.

Had to try the pump bracket. Only have one printed, but it is still very sturdy.

This gives a little sneak peak into what I’m after. Had a very productive day and have a pretty good idea what to do with the PSU shroud that will be the next piece.
Leaving this day 2 with the second pump bracket loaded into the 3D printer. In 9h I will know if it turned out as good as the first one. Slightly different design.