I had a vision from start that I wanted to mount my GPU vertically. I think that all water blocks are to beautiful to hide. I didn’t want to use a factory solution as most of the shelf products are big and bulky. Time to go to work on my previously bought aluminium sheets and create my own Vertical GPU bracket.
As with all my mods for this project so far, I want to stay true to the amazing modularity of the be quiet! Dark Base Pro 900.

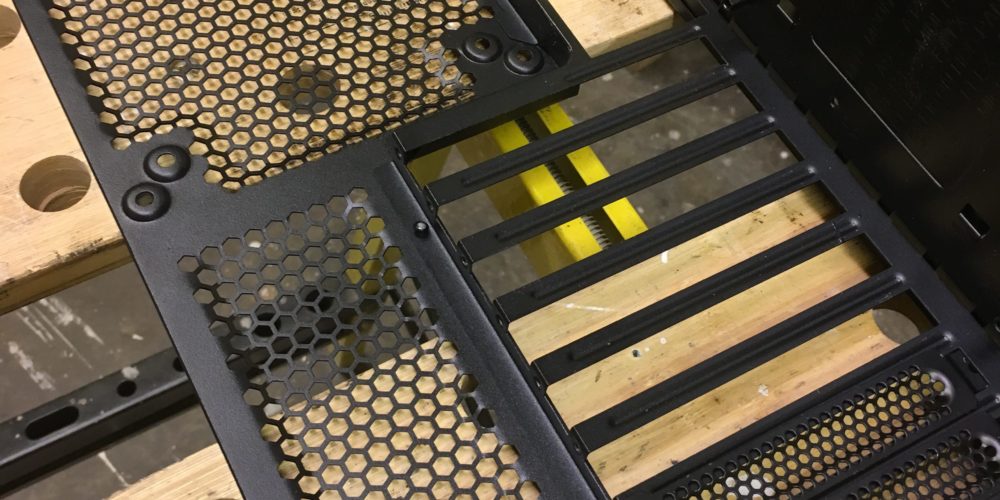
I started by unscrewing the PCI-brackets. Saved the last 3 as I want to maximise the number of available PCI-slots. I also had an idea to use one of the horizontal PCI-brackets to mount the the new vertical GPU bracket.


The top will be saved, but all the rest needs to go without damaging the screw holes. Time to bring out my high tech saw…

This is how I do most of my mods atm. By hand with very low tech tools. It works, but takes longer and hurts more 🙂

This was a scary moment. One of my first real none reversible mods on this project, but can’t turn back now. It will hopefully be wort it when I have created my Vertical GPU bracket to display the amazing ASUS 1080Ti and EKWB ASUS ROG Ti water block.

Need to file down the sharp edges on the part of the brackets I left with the screw holes. I want to hide them and keep them for future proofing.

Cut a piece of aluminum in the right size and took measurements. As I want to keep as much of the case intact, I have to make cutouts for the two rivets.
Put a small drill in the drill press and used that to cut two tracks in the aluminium bracket for the case rivets. Then I drilled and threaded two holes and countersunk the holes for the mounting screws.

Very happy with the placement at this point. The cut outs for the case rivets isn’t visible, but makes it possible to mount the bracket side really snug.


Mounting the PCI bracket back on top of the new side. Perfect fit with just the right amount of overlap to make it look the way I wanted.

Drilled and tapped new holes on top of the the vertical screw holes I left when removing the horizontal brackets. Worked perfect to mount the horizontal PCI brackets.

Filed down part of the top horizontal bar to ensure enough room when mounting the PCI brackets vertical and making room for the ASUS ROG GTX 1080 Ti that will fit there l8r. I made room for 3 brackets, so I can use both full sized cards or dual water cooled single slot cards.


I masked the case before adding some satin color back to fix the small scratches I created when modding the motherboard and backside plate in my be quiet! Dark Base Pro 900 computer case.


Really happy. This worked out just as good as I had hoped. Next step is to create a custom plate GPU bracket to fill the hole left of the vertically mounted PCI brackets. Can’t leave that open…
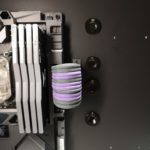
[…] Backplate mounted and card is done and EKWB logo unpeeled 🙂 Will look amazing mounted in my custom vertical GPU bracket. […]
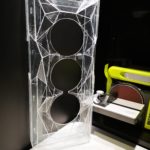
[…] Vertical GPU bracket ASUS ROG 1080ti for be quiet! Dark […]