The first part of this GPU bracket mod went very well, but left a big hole to finish. I have planned for an ASUS ROG FE GTX 1080Ti with an EKWB plexi water block.
This amazing card needs to be mounted vertically which I fixed in a previous mod, Vertical GPU bracket for ASUS ROG 1080Ti part 1 that you can read about. I decided to do a cover plate in aluminum and as previous, it will be done with hand tools as that is what I got.

Started with taking measurements and factoring in the extra length and width needed for the angled GPU bracket. Draw the shape on my aluminum sheet and cut the piece with my hand saw.

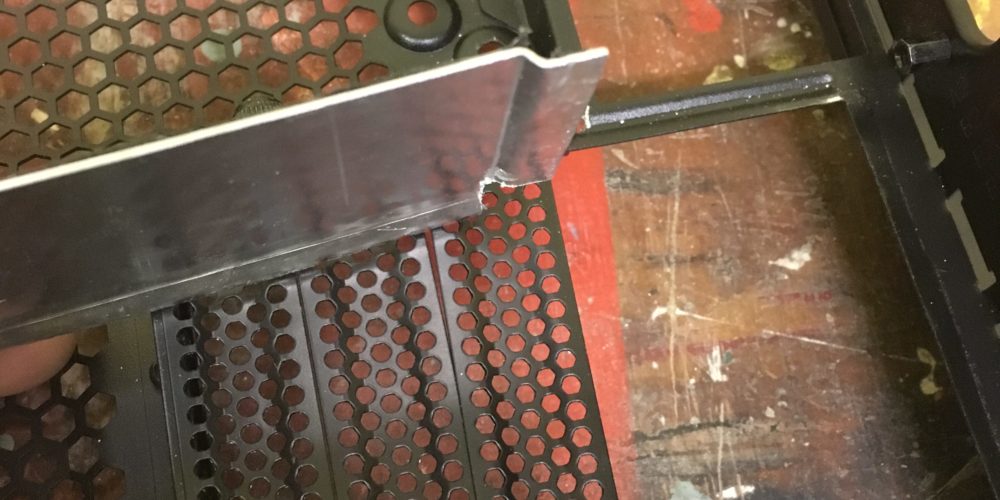
I then put the piece in a vice and worked both edged with a regular screw driver and a hammer. Took a lot of very light hitting to mould the shape without braking the aluminum. Actually took me two tries, as I broke the last piece with the last few blows and cracked the sheet.

Second sheet and much better and sharper edge with no broken edges 🙂 This might actually become a Vertical GPU bracket after all…

This is after some finishing touches with hammer and pliers to keep the edges sharp and straight. Still amazes me how much you can create with a few simple hand tools.
Had to fix the corners of the GPU bracket and give them a soft roundness, both for aesthetic reasons, but also for not scratching the case when mounting.

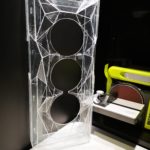
Next step was to make holes to give the plate a more pro look and to ensure air flow. Can’t forget about airflow. The aluminum piece still has the protective plastic on, thats why it looks so dull and grey.

Did a small mark of all the holes with a small nail and a hammer. Ready for 27 rounds with the drill press with two different drill sizes. Hope this will work.

Not bad, not bad at all. I had some trubble as the aluminum is so soft and I added that many holes, that the plate bent. That made some of the holes a little oval, so had to go over all the holes a second time with the drill and then a small rounded hand file. That finally made them all round.

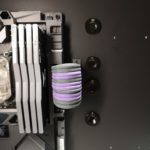
From the backide. My hand hammered mounting edge still needs some final touches.

From the inside of the case. The bracket will be fixed with both the horizontal PCI bracket, a small screw in the lower right corner (notice the small rectangle to ensure it gets counter pressure) and the last vertical PCI bracket.

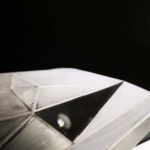
The light makes it look a little wobbly even if its not, but the satin color turned out to shiny. Will have to find a more matt color to match the case. I’m happy with the result.
I would like to hear your options. Please add a comment and tell me what you think so far. What did you think of the holes drilled and the choice of pattern?
[…] I did a vertical GPU bracket in a previous mod I ended up with more than a little sag on my GPU. The structural integrity of the […]